
- All the work to be performed inside the appliance requires specific skills and knowledge and may only be carried out by qualified and authorised Service Engineers
- This platform is not fitted with an ON/OFF switch.
- Before you access internal components, take the plug out of the socket to disconnect the power supply.
- Some of the components in the mechanical part could cause injuries, so wear suitable protection and proceed with caution.
- Always empty the appliance of all the water before laying it on its side.
- If the appliance has to be placed on its side for maintenance or another reason, lie it on its left side, to avoid the risk of any residual water falling onto the main circuit board.
- Never place the appliance on its right side (electronic control system side): some of the water in the detergent dispenser could leak onto the electrical/electronic components and cause these to burn
How to exchange the bellow seal
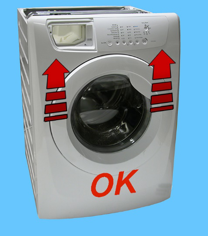
1. Worktop
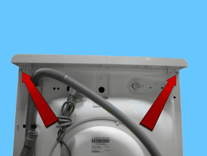
Remove the screws that secure it to the back panel.

Pull it out from the back.
2. Door safety interlock
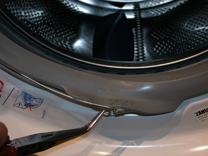
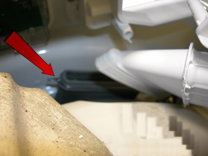
Remove the iron ring securing the bellow seal to the unit.
Remove the part of the bellow seal concerned from the unit.
Take care not to scratch the cabinet.
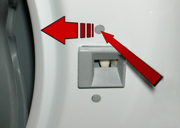
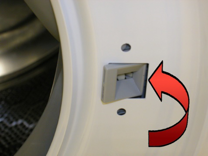
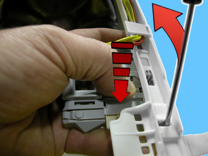
Push the pin at the top inwards and at the same time move the door safety device towards the left.
Holding the top still.
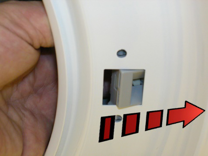
Push the pin at the bottom inwards and at the same time move the door safety device towards the left.
Turn it towards the inside (right-hand side of the flange).
Pull it out and remove it.

Remove it.
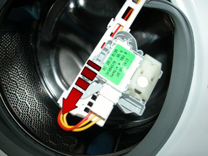
Pull a little of the wiring out of the protection and remove the connector.
Release the hook, remove the wiring and move it.
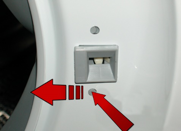
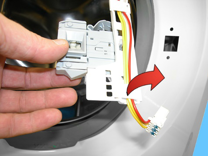
Insert a flat-tip screwdriver into the slot near the hook.
Tilt it in the direction of the arrow so as to release it from the latch, while
at the same time pushing the micro-switch with your thumb in the direction shown by the arrow.
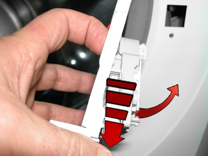
After releasing it from the latch which secured it to the protection.
Move it in the direction shown by the dotted arrow and turn it in order
to remove it.
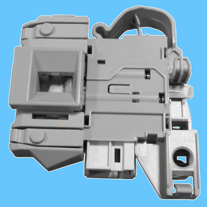
Safety device.
To reassemble the door safety interlock, repeat the same tasks in
reverse order.
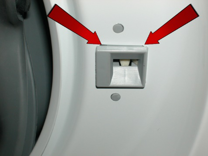
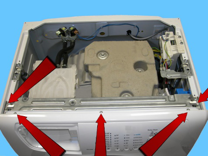
After inserting the door device in its seat, make sure the flange is positioned properly on the outside as shown by the arrows.
3. Front panel
Remove the worktop (see relevant paragraph).
Remove the iron ring, remove the door bellow seal from the front panel.

Release the door safety device (see relevant paragraph).
Tilt the washing machine towards the back.
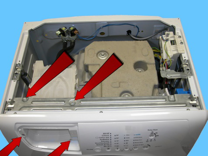
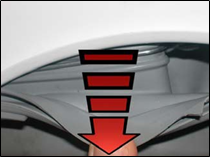
Unfasten the three screws securing the front panel at the bottom.
Raise the lower part a little without removing it entirely.
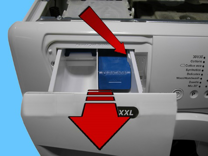
Take out the detergent drawer while at the same time pressing on its sides to pull it out (otherwise pull sharply).
Remove the two screws securing the drawer compartment to the control panel.
Loosen the screws which secure the dispenser to the crosspiece.
Loosen the screws which secure the front panel to the crosspiece.
Remove the four screws which secure the crosspiece to the rear cabinet.
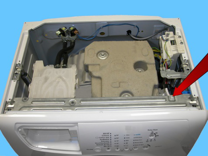
Remove the clamp that secures the wiring.
Remove the wiring connector connecting the display board.
Remove the crosspiece.
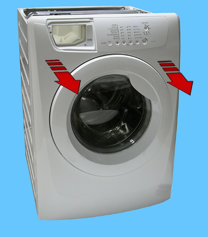
To remove the front panel, first lift it up
and then pull it out of its supports.
Take care not to warp the screw seats, because reassembly will be difficult if
they are warped.
4. From the front panel, you can access bellow seal

Once the door bellows seal has been removed from its seat in the cabinet. Remove the pocket from the drawer compartment assembly.
Pull out the drawer compartment from the bellows seal detergent inlet pocket.
When reassembling:
If the clamp was removed, reposition it in its seat (shown by the arrow)
in the bellow seal detergent inlet pocket.
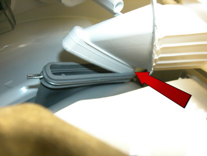
Lubricate the outside of the drawer compartment.
Lubricate the inside of the bellow seal detergent inlet pocket.
Gently insert the part of the drawer compartment indicated by the arrow into the detergent inlet pocket of the bellows seal.
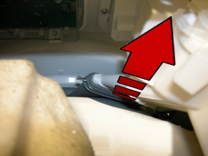
Remove the snap ring fixing the seal to the tub.
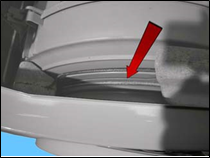
Take the seal out of the welded tub.
(Take care as the seal is held in position by a snap ring.)
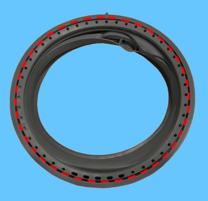
When reassembling the seal.
Use liquid soap to lubricate the part where the tub is inserted (indicated
by the red circle).
Make sure the references are aligned.
Reassemble the snap ring between the door bellow seal and the tub.
Reassemble the iron ring between the door bellow seal and the cabinet.